By Dionna Dash
In a world overflowing with emails, newsletters, and generic updates – not to mention shrinking attention spans – standing out takes more than a well-written message.
Enter personalized video, an authentic, human-first way to thank, update, and inspire your supporters.
Our team is excited to launch Storyraise Video. With just a few clicks, you can create and send tailored video messages that help enhance donor relations and raise funds.
Keep reading to discover how to create personalized videos with Storyraise and how easily you can start using them to make a lasting impression.
Step 1: Choose Your Template
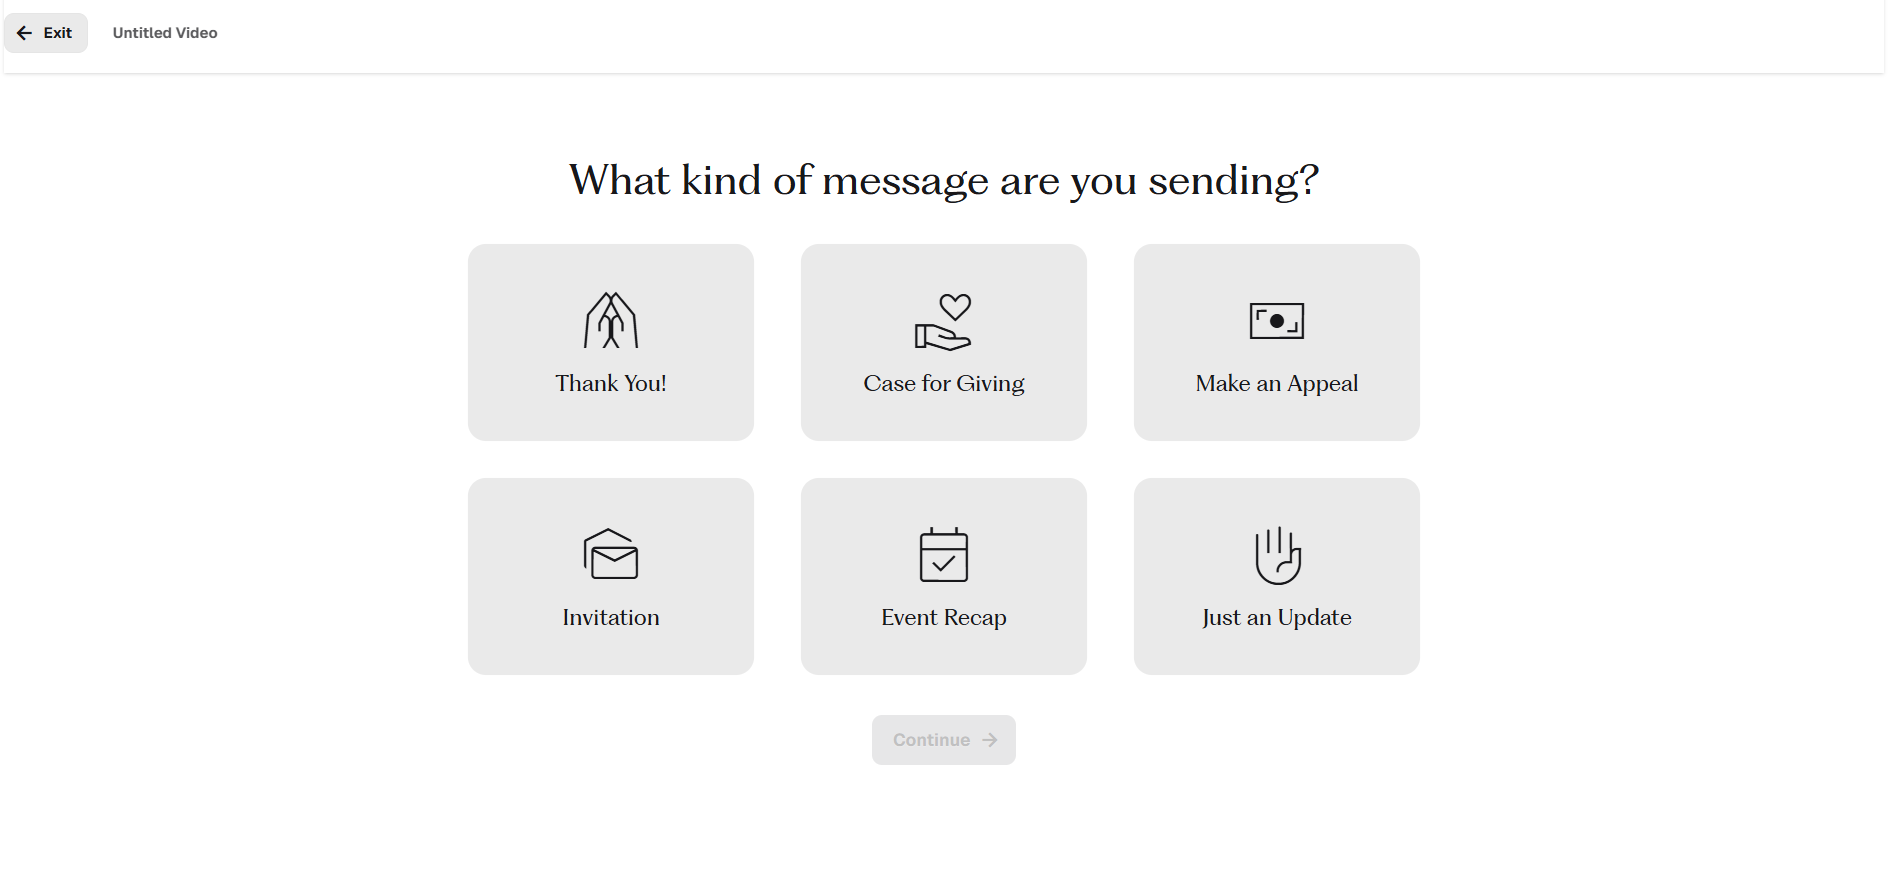
Begin making your video by choosing a template. Each option has preset features that can be modified in later steps.
🙌 Thank You: Use this template to express gratitude to donors for a recent gift
🎁 Case for Giving: Use this template to explain why donors should give to your organization
💸 Make an Appeal: Use this template to ask donors for gifts
💌 Invitation: Use this template to invite donors to an event
💃 Event Recap: Use this template to follow up with donors after an event
📂 Just an Update: Use this template for all other purposes
Step 2: Upload Recipients
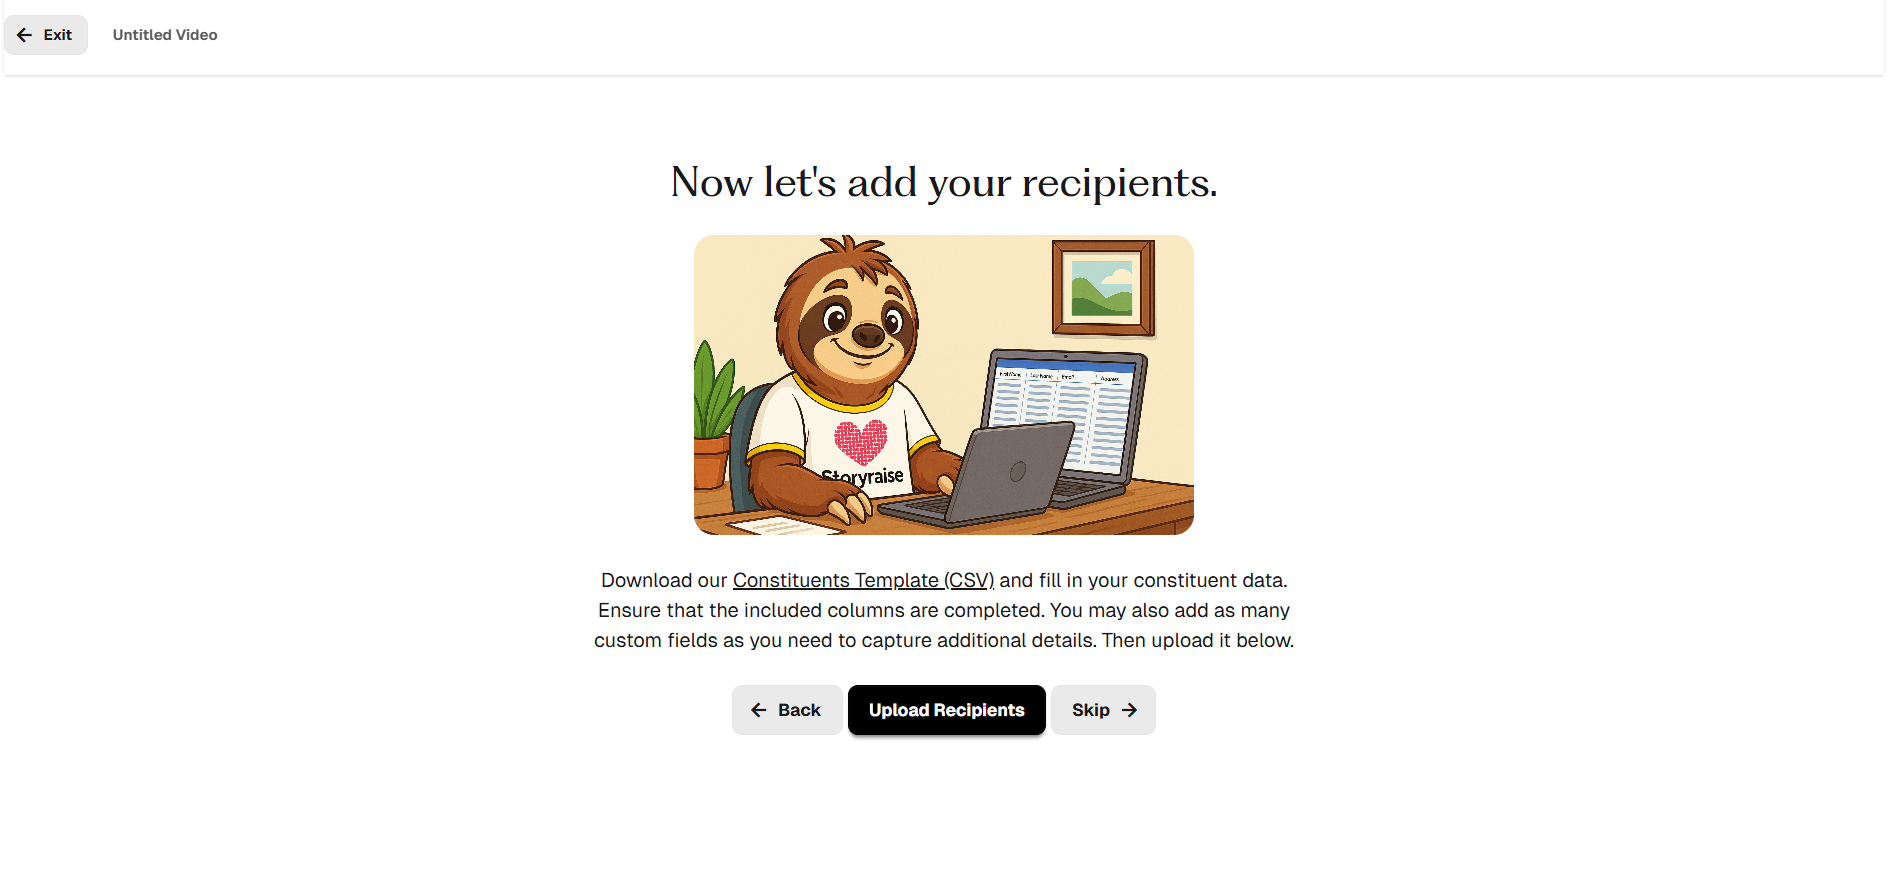
Once you’ve selected a type of message, you’ll need to add in contact information for all those you want to receive that message. Use the provided Constituents Template CSV file to ensure that you include all necessary contact information, and feel free to add any extra columns you’d like.
Contact information included in this step can be used to personalize your video in later steps, so consider adding columns like “giving level” and “program supported.”
Step 3: Record Your Video
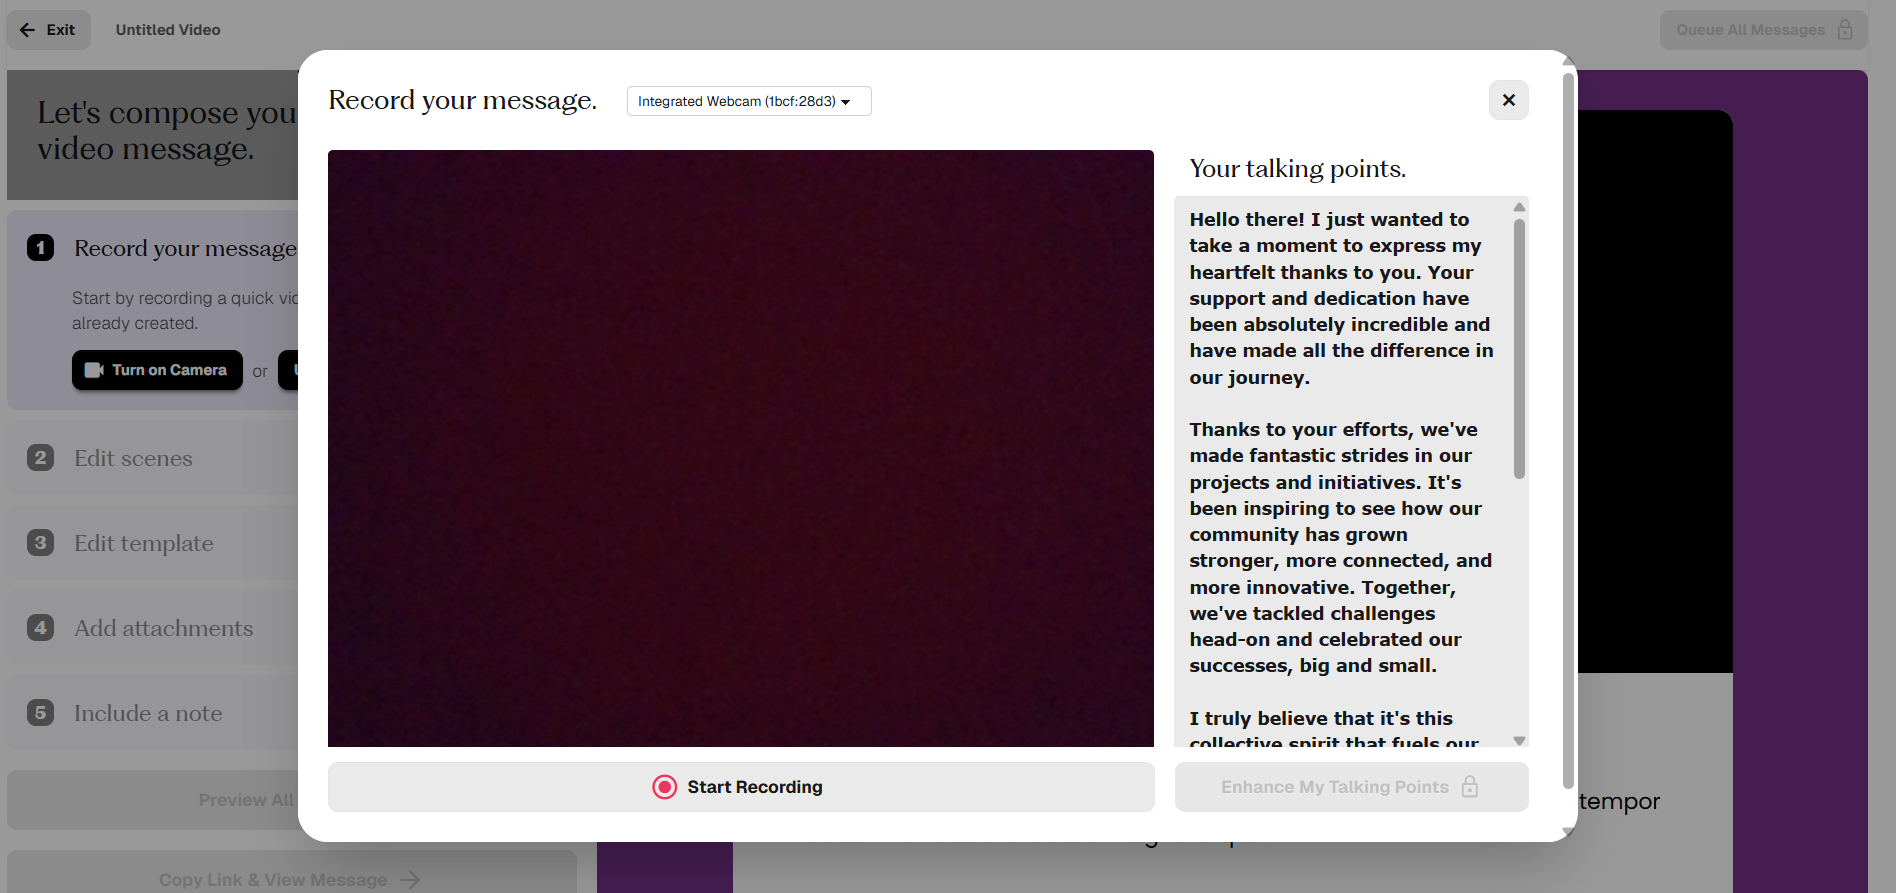
You’ll now enter the video builder where you can either upload or record a video. If you choose to record one, talking points for a 60-second video will pop up on the right side of the screen. You can easily read them while still looking into the camera.
These talking points are generated by Sammy Sloth, our AI-powered mascot, and they’re based on the video template you choose and the recipient data you enter. You can edit these talking points manually, enhance them by clicking the “Enhance My Talking Points” button at the bottom of the screen, or replace them with your own script.
The best part? You can easily collaborate with your team members by entering in a script for them to record later.
Step 4: Edit Scenes
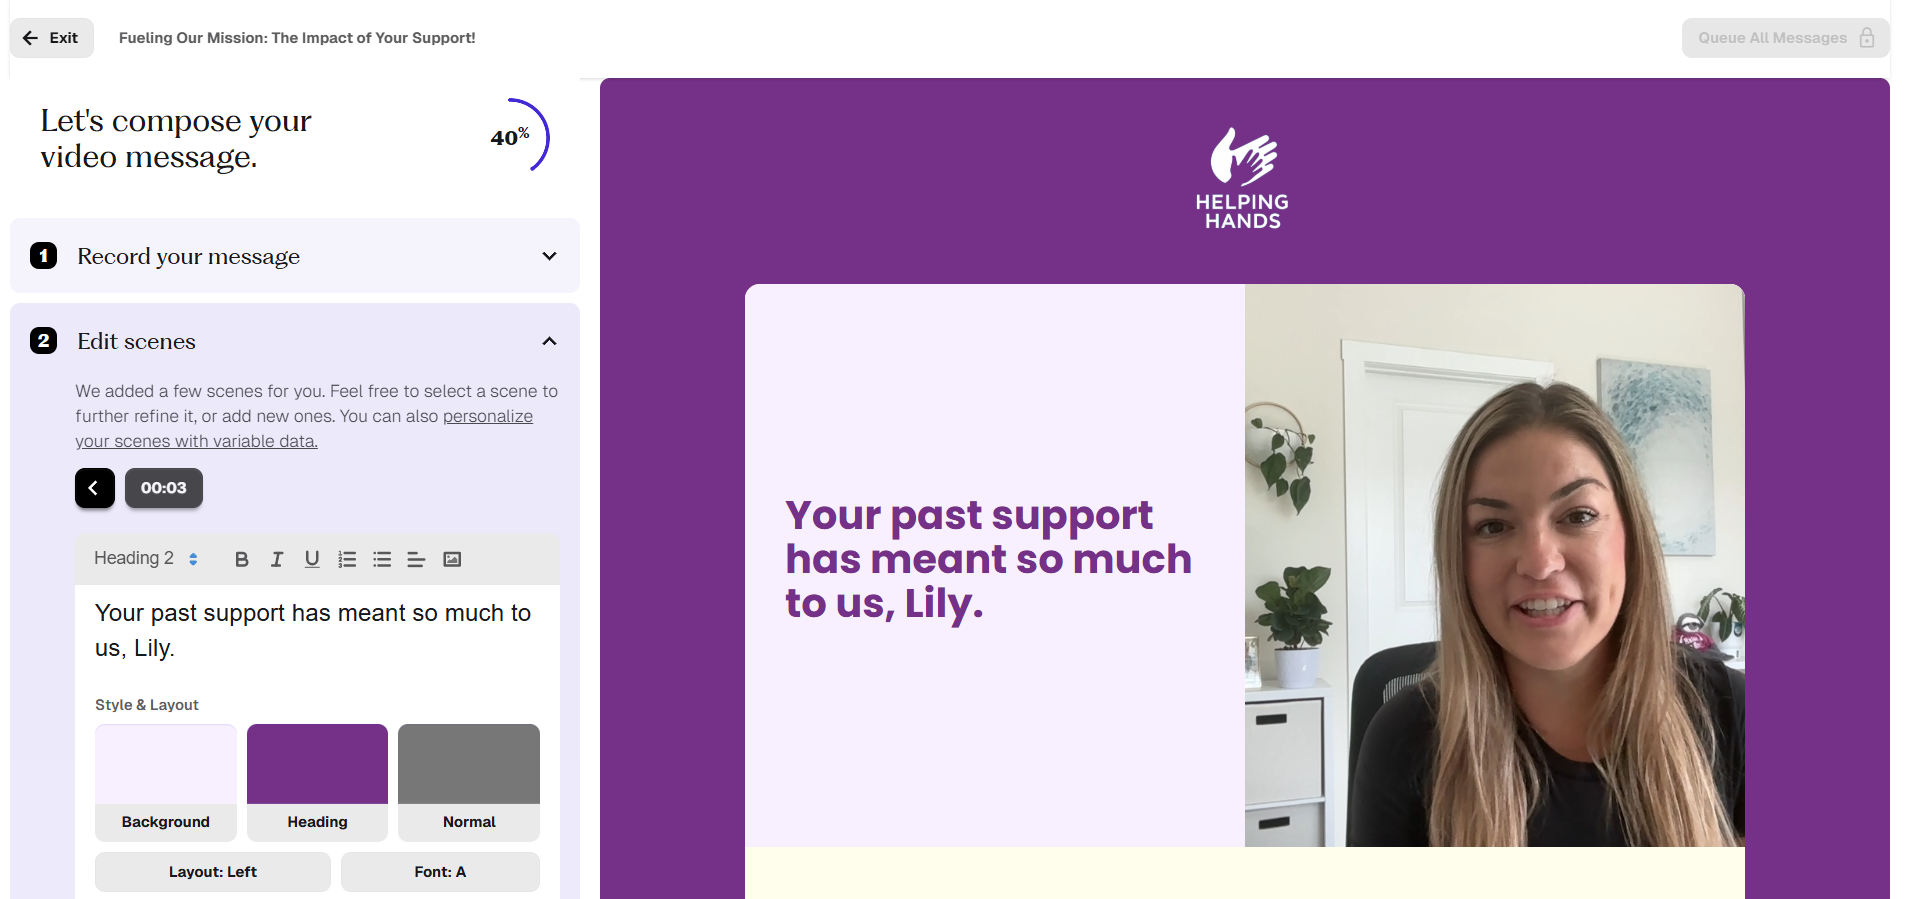
Now that you’ve recorded your video, it’s time to edit your scenes. Scenes are moments in the video that Sammy Sloth and his AI powers have added in to emphasize important content.
For example, after you thank your donors during the video, Sammy might add in a scene with text that says: “Thank you for helping us reach our goal! Your contribution will change lives.”
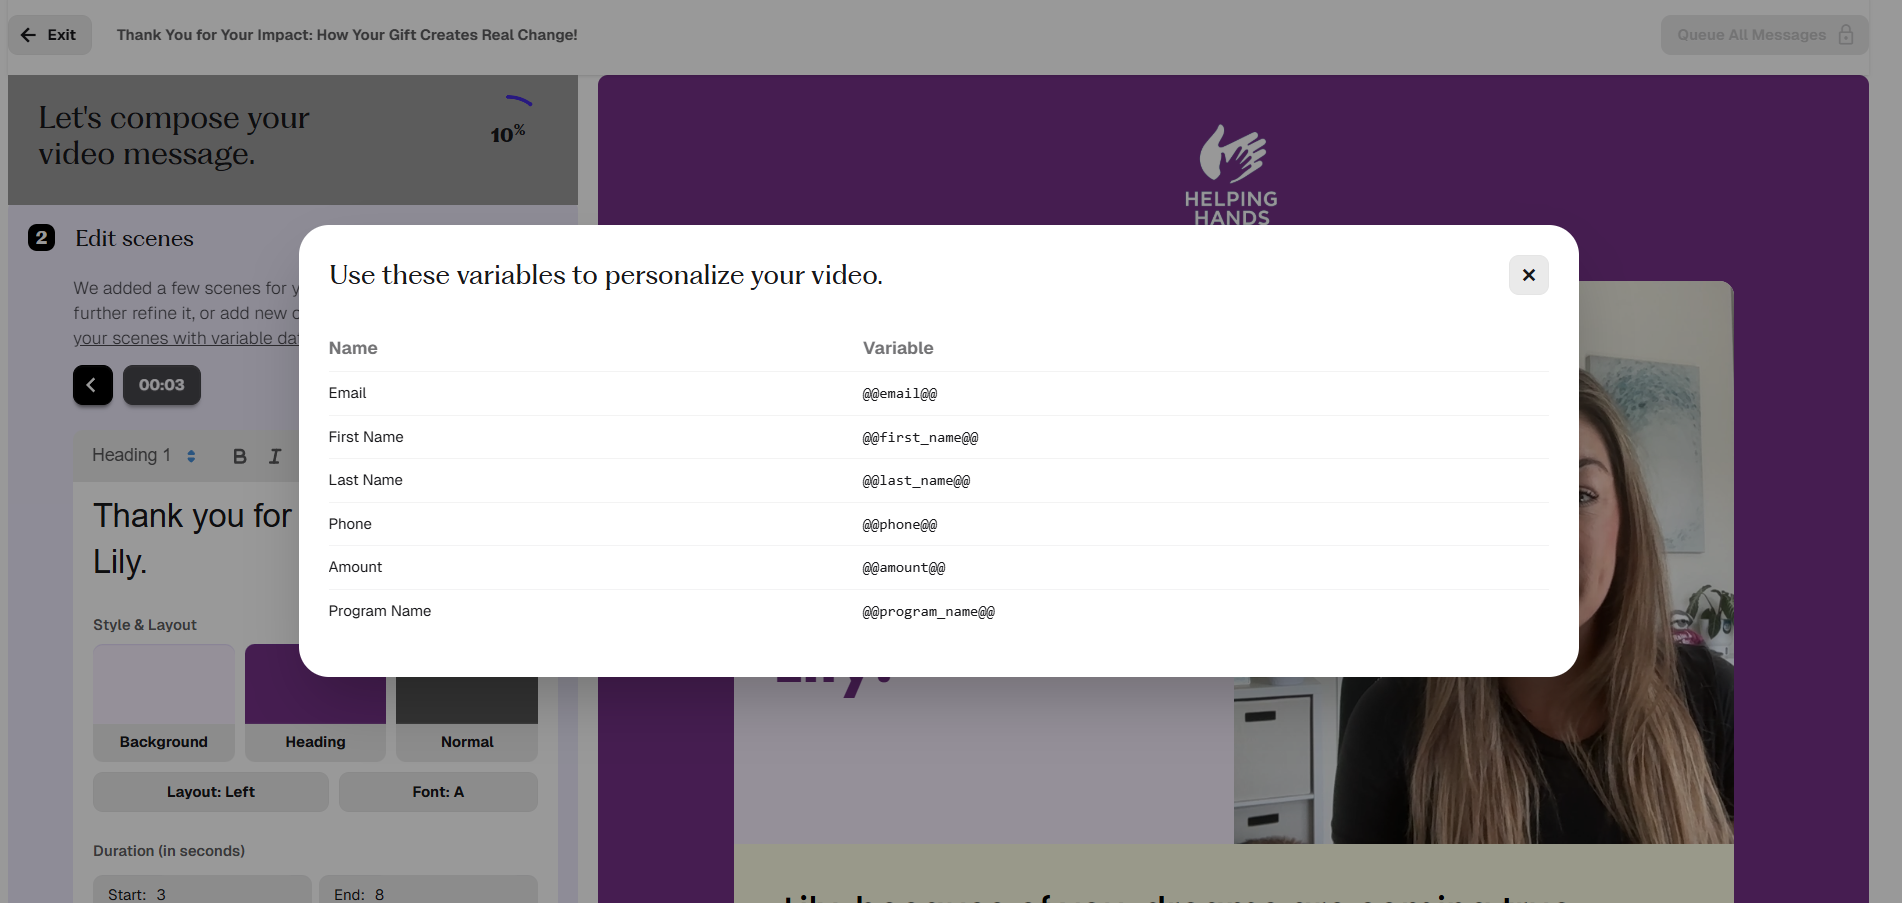
This is where personalization comes in. You can add variable data tags to these scenes so that each donor’s first name, giving level, or other information appears. “Thank you for helping us reach our goal! Your contribution will change lives.” can easily become “Thank you, Bianca, for helping us reach our goal! Your $150 contribution will change lives.”
You can also use this feature to add photos and graphics to the video.
All pre-populated scenes can be removed if desired, or edited to change their font, color, text size, page location, and length of appearance on screen.
Step 5: Edit Template

Once you’ve finished editing your video, it’s time to customize the page on which it lives. Add a title, description, and logo, and edit the background color, font, and text size and color.
Step 6: Add Attachments
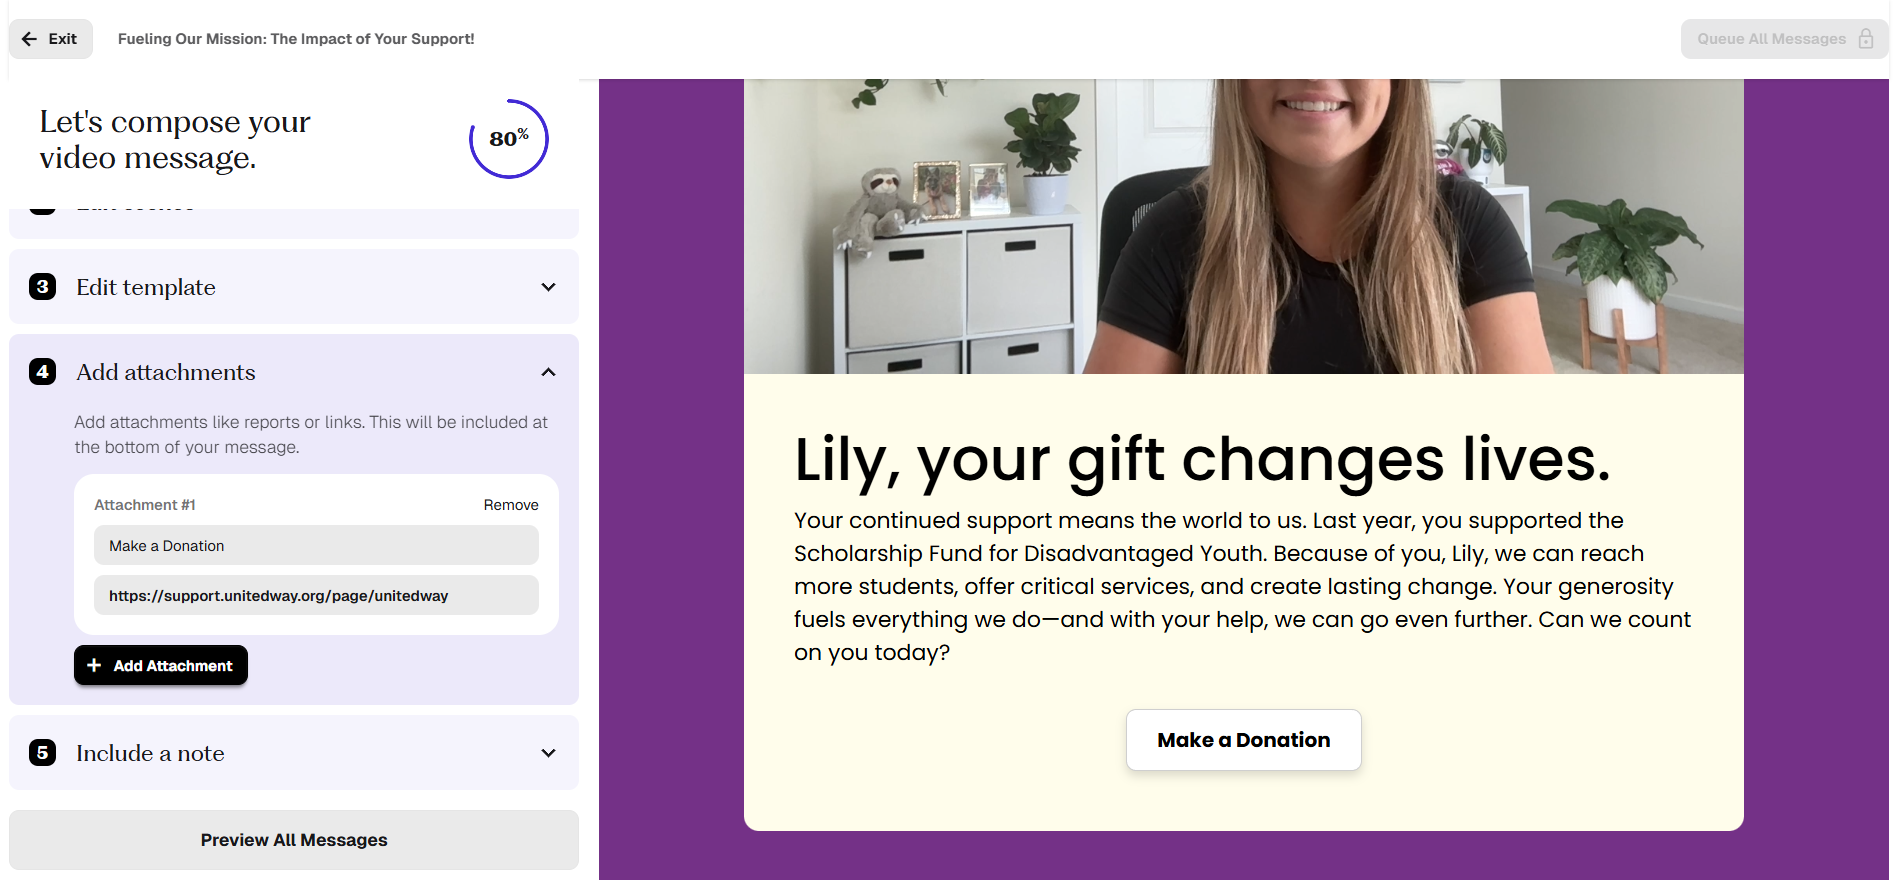
Add a link or button directing recipients to your website, a report, or any other place you’d like.
To make giving as easy as possible, you can embed an existing donation form directly beneath your video. Donors can make a gift without ever having to leave the page.
Step 7: Include a Note
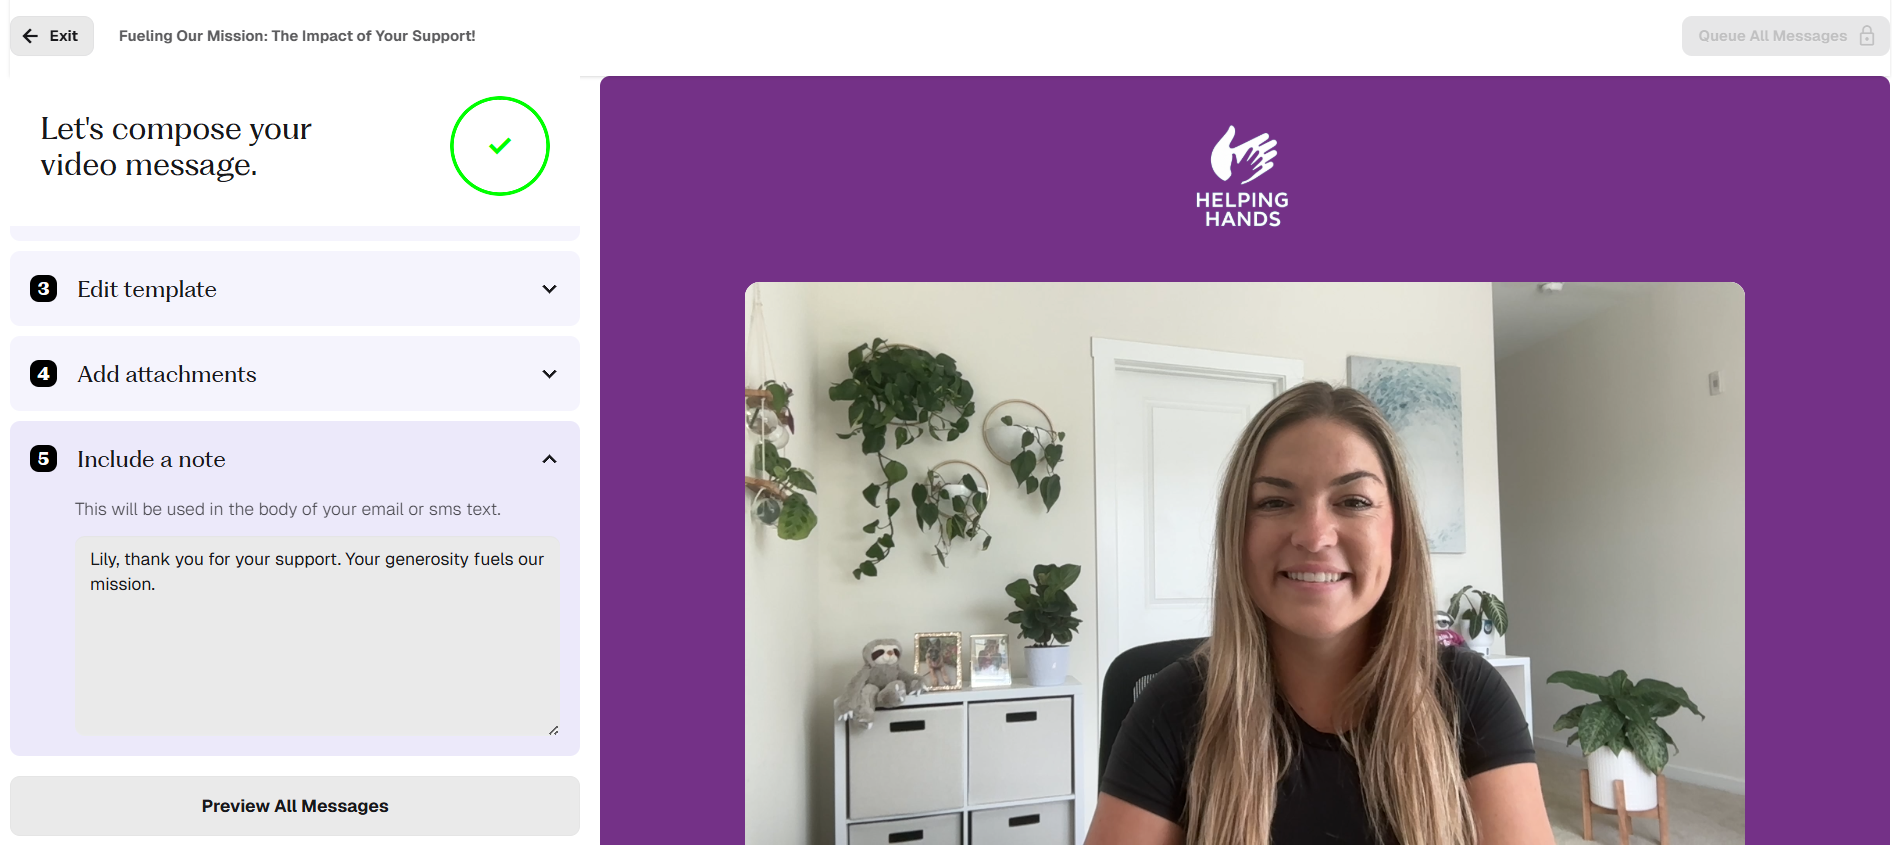
Once your video and page are complete, type in a personalized message to be included in the body of the email or text message when you send the video to recipients.
Step 8: Review and Send

Almost done! Preview your message for your general audience or select a recipient to view the video exactly as they’ll see it. You can make final edits directly in the preview version of each recipient’s video. The builder will only make the changes in that recipient’s specific video.
Once you’re satisfied, you can send your video to recipients individually or to multiple people at the same time. The video builder will mark who has received a video and who hasn’t yet.
And voila! Sit back, relax, and wait for your engagement to improve.
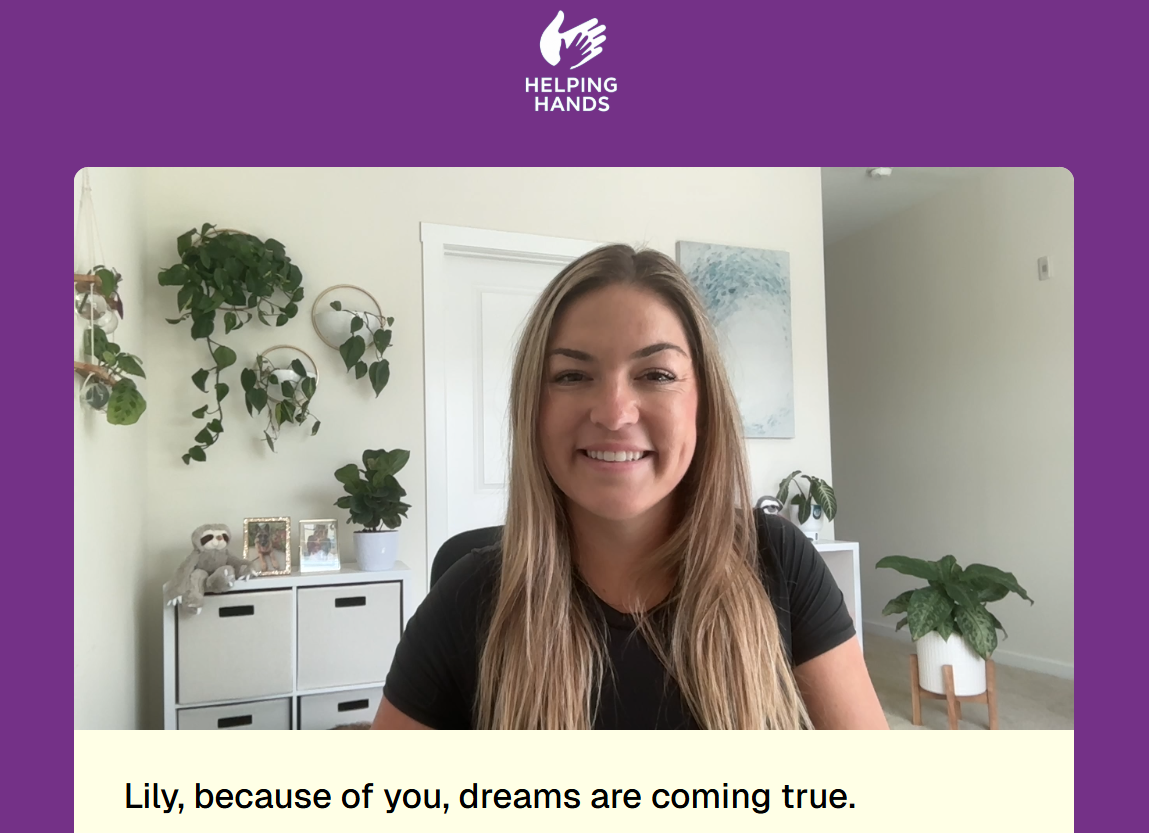
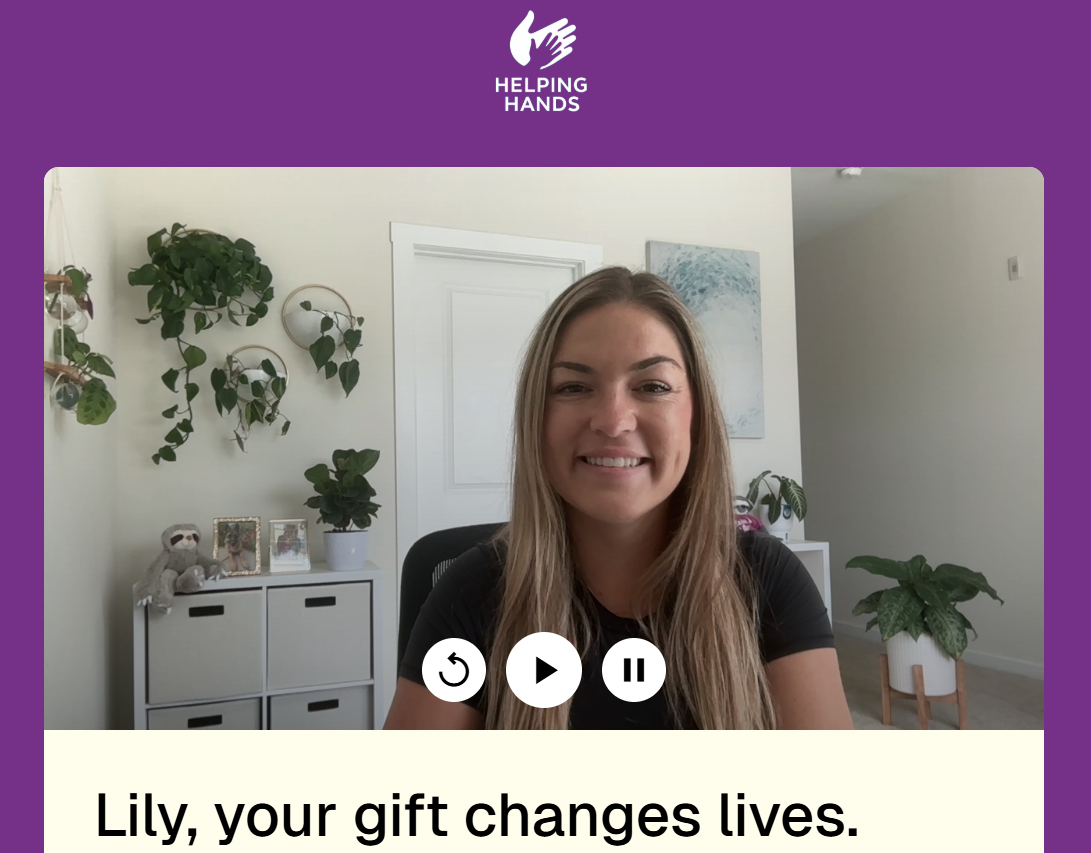
Video Examples
Check out these two examples made with Storyraise Video.